In Part 1 we covered the steps of seed raising and propagation, and now it’s time to look at different ways of preparing your soil for veggies (whether you’re starting a veggie patch in the backyard or growing in containers or raised beds) and how to transplant and care for seedlings.

Starting a Veggie Patch

If you’re lucky enough to have a backyard you can use to grow veggies, the first thing you’ll have to do is prepare the soil. There are many different ways to do this, but we’ll just be covering the two main techniques which can be used depending on what resources you have available.
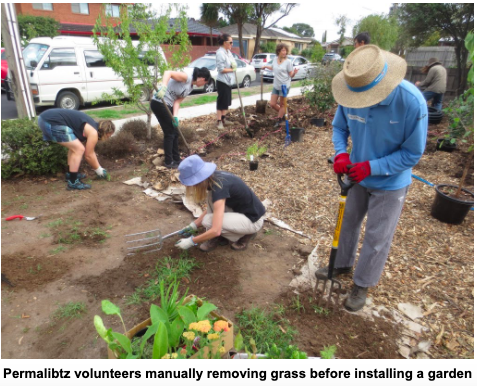
Option 1: Put your back into it! This method is more labour intensive but requires less resources; you’ll just need a garden fork, shovel or hoe and some compost.  1.) Start by marking out your garden area, making sure it’s in a spot that will have full sun even in Winter (ideally with a bit of afternoon shade in Summer if you’re in a hot climate), close to a water source and easily accessible from your house. 2.) Once you’ve marked out the garden, use a hoe to dig a small trench around the outside perimeter, to form a barrier between the garden and the grass outside.  3.) Use a hoe or garden fork to uproot the grass, using your hands to pull out all the grass roots. If your backyard has couch grass or kikuyu, it’s especially important to make sure to remove all the roots as these can regrow from even the smallest root piece left in the bed, and these will compete with your veggies for water and nutrients.  4.) Once you’ve removed the grass, use your garden fork to pierce the soil and gently loosen and decompact it, without turning over the soil. This will help plant roots find their way through the soil easier, while allowing for better drainage and aeration.  5.) Add a thick layer (10cm is good) of compost, and either mix it into the top layer of soil or just leave on top and plant directly into it.  Tip: It’s important to do some research on the history of your site to see what the chances are that your soil is contaminated. A lot of land in cities is ex-industrial and can have a legacy of contamination, and many house blocks in Melbourne have traces of lead in the soil due to lead-based paint on old houses flaking off and landing in the garden. If in doubt, best to do a soil test which you can do for free through Macquarie University’s Vege Safe program (or grow in raised beds instead): https://research.science.mq.edu.au/vegesafe/
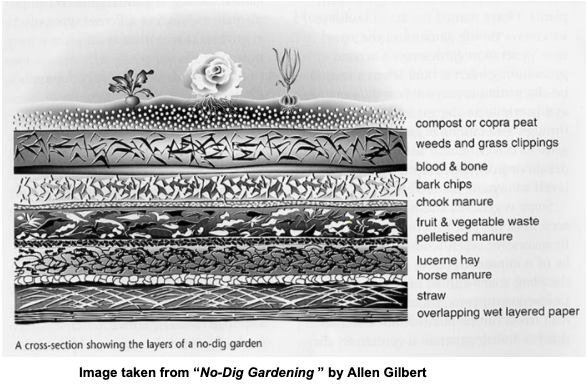
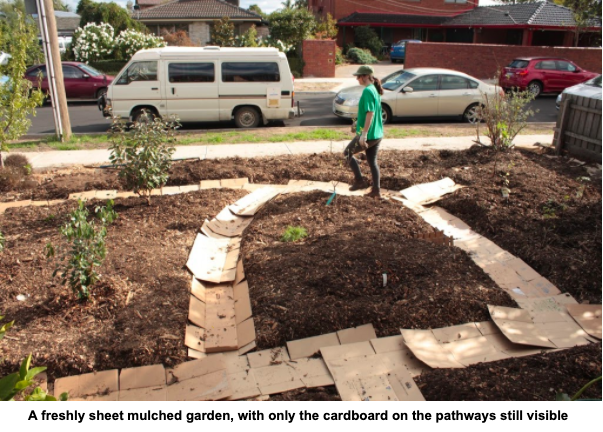
Option 2: Sheet mulch/lasagna garden method If the idea of digging for hours isn’t your cup of tea, and you have access to some free organic materials close to home, this method is probably for you. It’s essentially the same process as making a compost pile, but which you can plant into immediately and which will eventually break down into delightfully rich soil, teeming with life.   You’ll need: – Newspaper, cardboard or hessian sacks  – Carbon sources: Straw, autumn leaves, shredded newspaper  – Nitrogen sources: Manure, fresh grass clippings (not grass roots!), non-seedy weeds or green waste from the garden, kitchen scraps, fish meal, coffee grounds, blood and bone, organic fertiliser pellets 1.) The first step is the same: dig a trench around the garden area to create a barrier between the grass and your bed. If this isn’t possible for you, it’s also fine to just layer the newspaper, cardboard or hessian around the perimeter of the bed with mulch on top, you’ll just need to stay on top of the weeding to ensure no grass encroaches into the bed. 2.) Start by laying thick layers of newspaper, double layers of hessian sacks or single sheets of overlapping cardboard on top of your garden area and wet down with the hose. 3.) On top of this, spread a thick layer of brown materials, with a thinner layer of green materials on top of this, wetting each layer as you go. 4.) Keep alternating brown and green layers until you’ve used all of your materials, ideally to around 50cm high (which will drop down over the course of a few weeks and the materials start to decompose). 5.) Top the bed with a 10cm layer of compost to plant into, or alternatively just make small holes and put a couple handfuls of compost in each hole where you will plant your seedlings. Tip: Root vegetables other than potatoes will not do as well in a new sheet mulched bed than in regular garden soil so plant these elsewhere or leave them til the next season once all the materials have decomposed into a rich, loamy soil.  
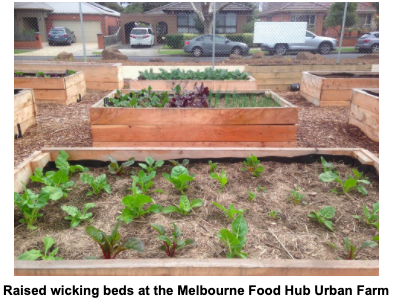
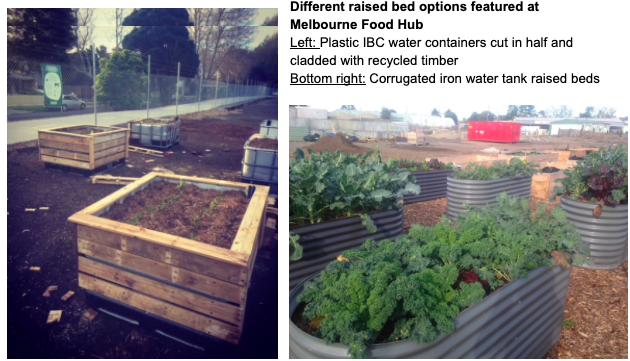
Growing in containers or raised beds If you’re short on space, have contamination issues in your soil or have trouble bending down, raised beds or containers might be a better option for your home food production. Apple crates, IBC water tanks and rain barrels cut in half are all popular recycled options for raised beds. On a smaller scale, styrofoam boxes, pots or food safe plastic buckets are good options for growing herbs or leafy greens in small spaces. The main things to keep in mind when growing food in containers or raised beds are: Drainage: If your container doesn’t already have drainage holes, you’ll need to poke or drill holes in the bottom to make sure excess water can escape. Soil: A good quality potting mix is fine for small containers, while a well draining soil blended with compost or aged manure is ideal for raised beds.
Watering: Raised beds and containers will dry out quicker than in-ground veggie gardens so make sure to keep on top of the watering, particularly in Summer. Despite what you may think, Melbourne winters can be quite dry so don’t forget to water your containers in winter too if it’s been a while since the last rain.

Tip: Always check the seed packet of the crops you’re growing to know how far apart to plant your veggies. 

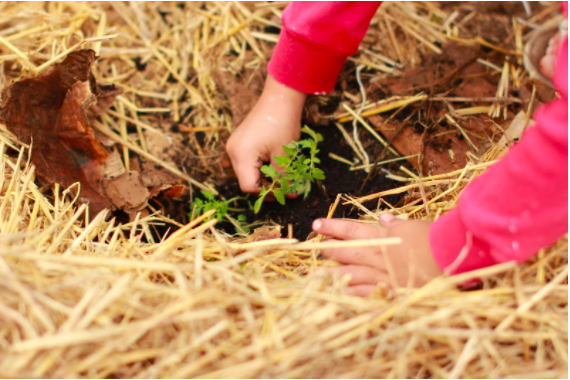
Keep your seedlings well watered while young, and feed them with season, worm juice or organic fertiliser every 2-3 weeks. As the plants grow and get more established, you can let them dry out a little bit between waterings. Deep, irregular waterings are better than regular shallow waterings because this encourages plant roots to grow deeper in search of water, making them more resilient in times of drought. 

Check your seedlings regularly to make sure they’re not being eaten by pests. Slugs, snails and cabbage moth caterpillars are the biggest culprits at this time of the year, but if you monitor the garden daily you should be able to keep on top of them by manually removing, squishing or feeding to chooks!

In the next article (Part 3) we’ll discuss succession planting, a technique to ensure a consistent harvest throughout the year plus we’ll go into more detail about organic pest management strategies including companion planting, crop rotation, physical barriers and (if all else fails), homemade or organic pest control sprays. 

Until then, happy gardening!